- Our Models
- Services
 Hesitant in service?
Get in touch with us with your business problem and we’ll consult you on the suitable service solution.
- Consultants
- Industries
- Our Company

- Locations


- Our Models
- ServicesHesitant in service?
Get in touch with us with your business problem and we’ll consult you on the suitable service solution.
- Consultants
- Industries
- Our Company
- Locations

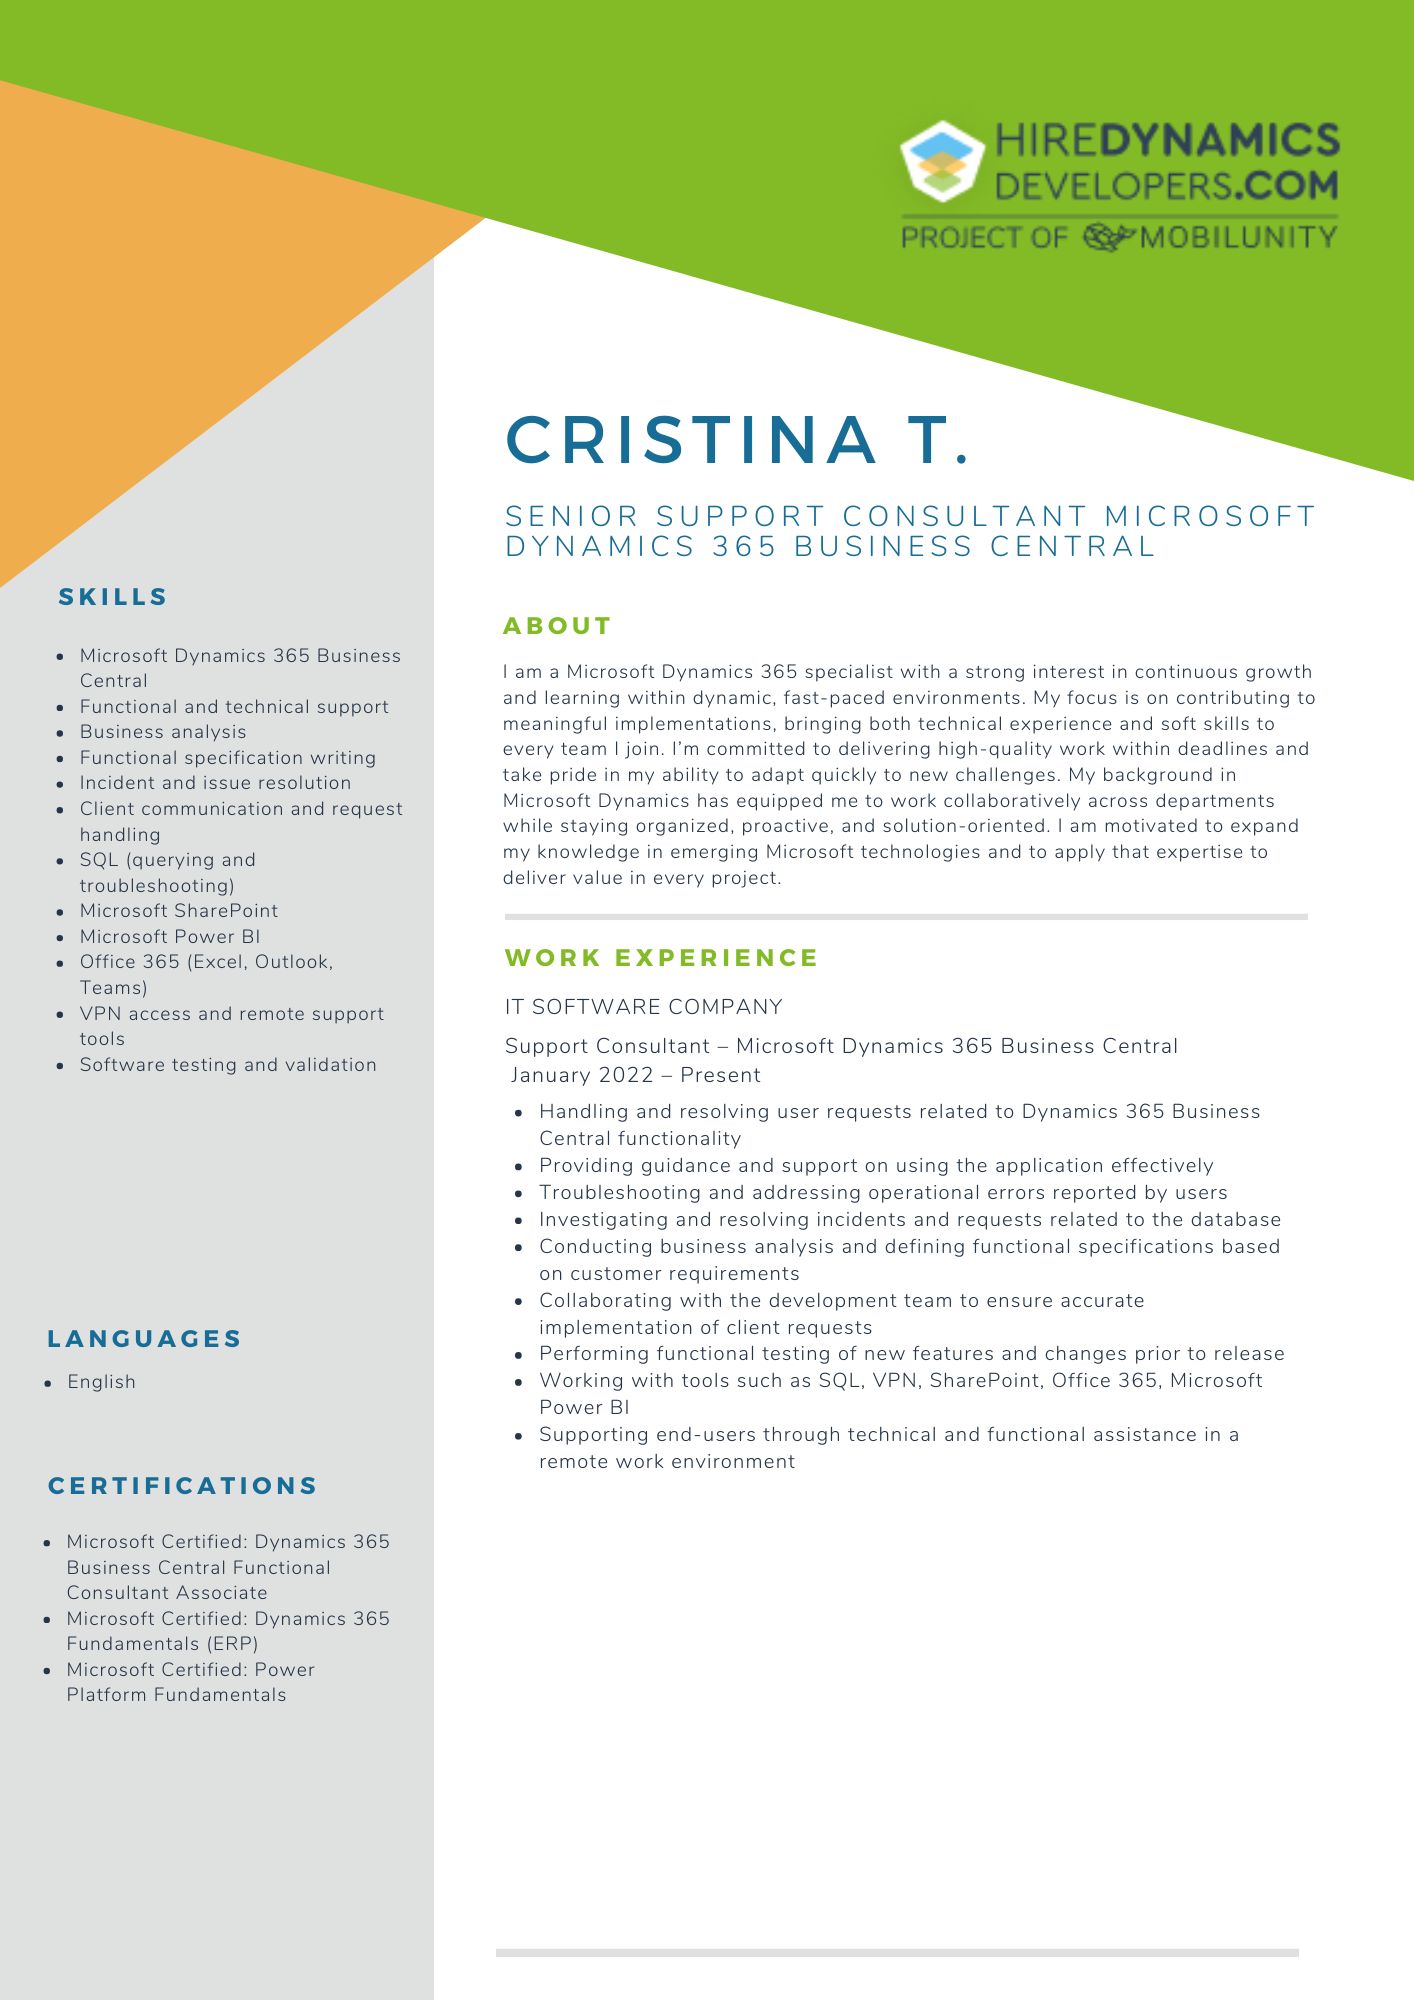


Elodie A.
Microsoft Dynamics 365 Consultant with finance background
 20 Hours / Week

Imeda U.
Junior Microsoft D365 BC Developer
10 Hours / Week

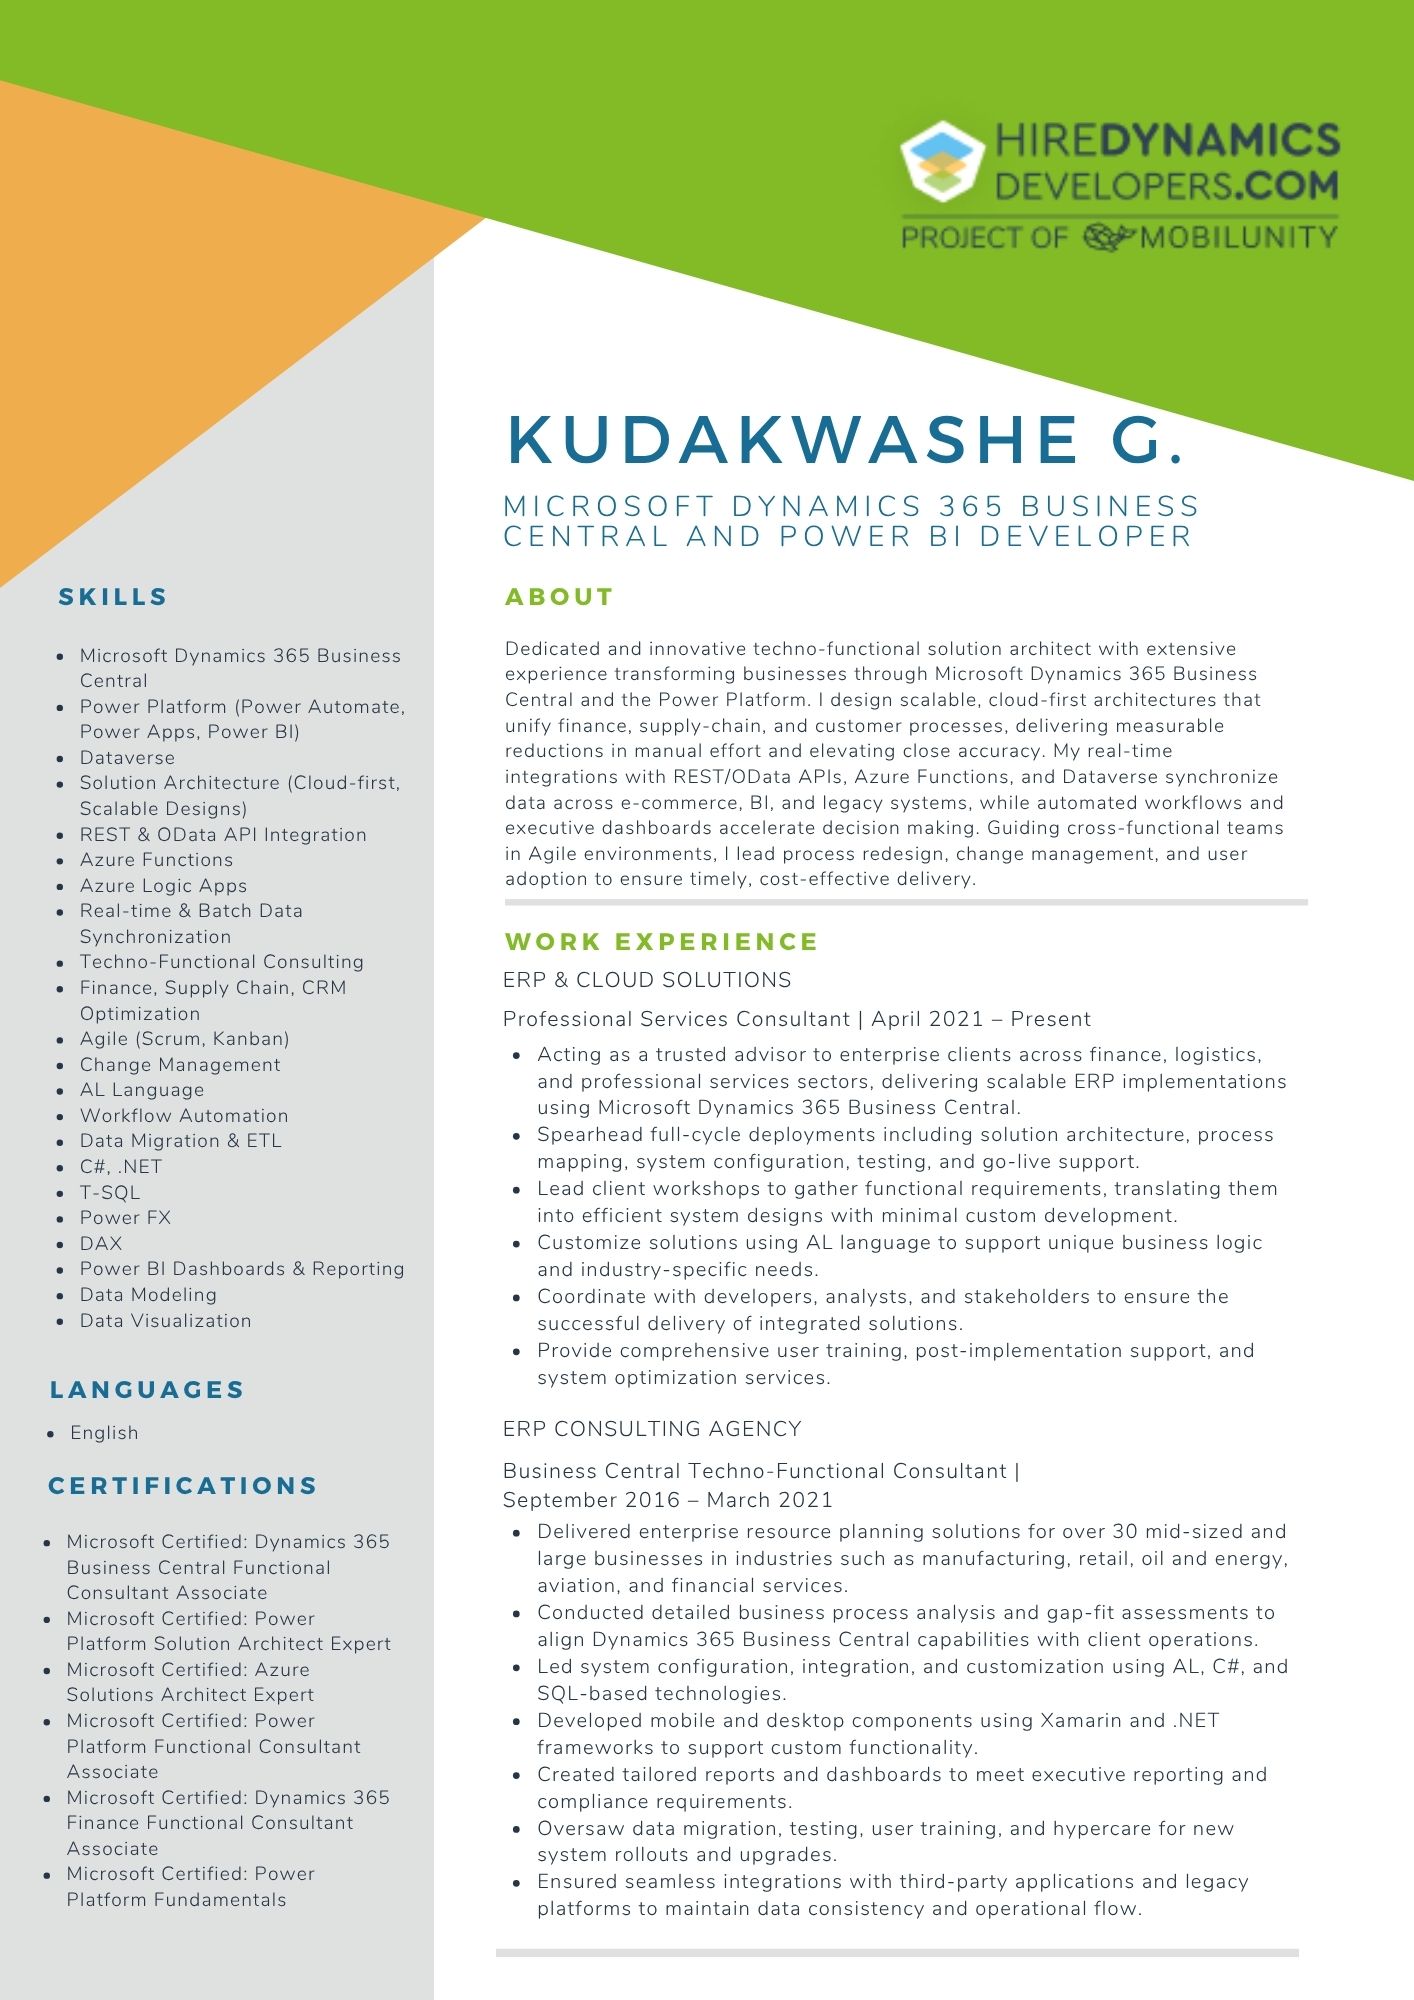
Kudakwashe G.
Microsoft Dynamics 365 Business Central and Power BI Developer
20 Hours / Week